In summary:
- True coastal driving enjoyment comes from proactive navigation, not passive observation.
- Mastering specific techniques for turns and stops frees up the mental bandwidth needed to appreciate the scenery safely.
- Strategic planning regarding your lane choice, timing, and route allows for a relaxed and breathtaking experience.
- Understanding the road’s geology and crowd patterns transforms a nervous drive into a confident exploration.
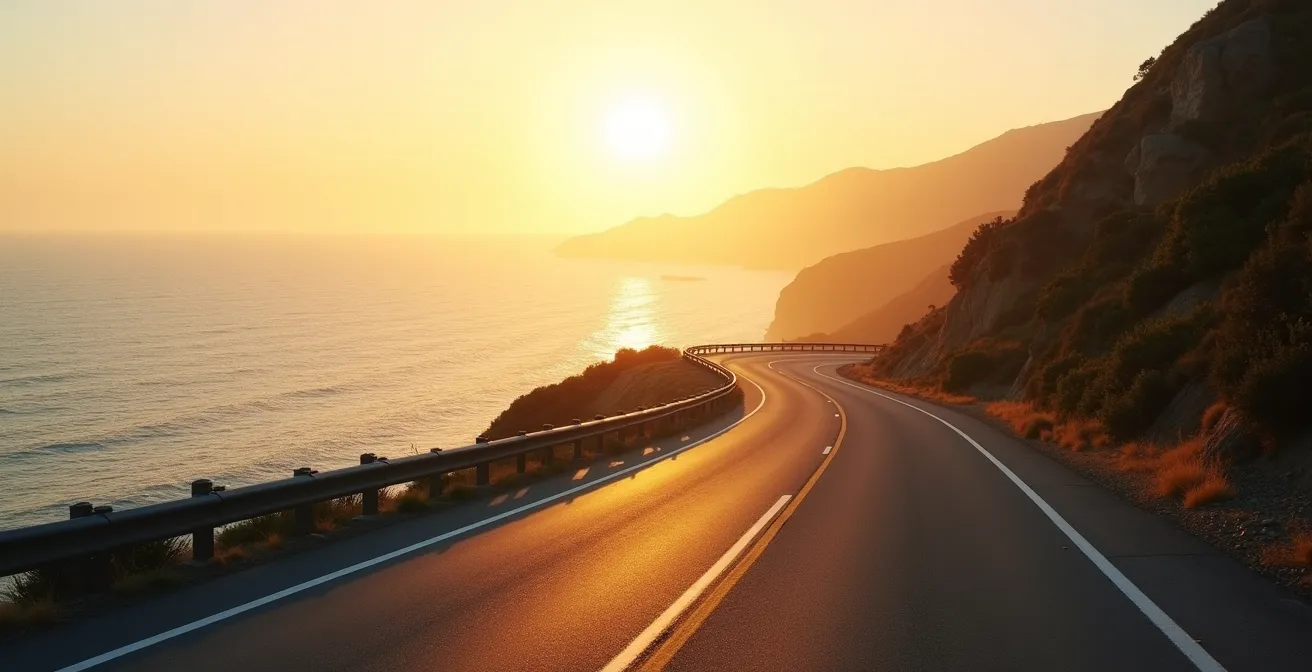
There’s a fundamental conflict when driving a world-class coastal highway. Your eyes crave the endless expanse of the shimmering ocean, the crashing waves, and the dramatic cliffs. Yet, your brain knows that a single moment of inattention on these winding, narrow roads could be disastrous. For many drivers, especially those tackling routes like California’s Highway 1 or the Amalfi Coast for the first time, this tension creates a stressful experience where the stunning view becomes a forbidden temptation. The common advice is often generic: “pay attention,” “drive slowly,” or “pull over for photos.” While true, these tips only address the symptoms, not the root cause of the anxiety.
They fail to acknowledge that safe, enjoyable coastal driving is a skill. It’s not about choosing between safety and scenery; it’s about developing a new mode of driving that accommodates both. The secret isn’t just about avoiding distractions, but about mastering the road with such confidence that you create the mental space to actually absorb the beauty around you. It requires a shift from being a reactive passenger holding a steering wheel to becoming a proactive navigator who understands the rhythm of the road, the psychology of focus, and the strategy of exploration.
This guide will teach you that specific skill. We will move beyond the obvious to give you the techniques of a seasoned driving instructor, focusing on the *how* and *why* of coastal road mastery. From the physics of navigating a tight switchback to the psychology of safely rejoining traffic, you will learn how to turn fear into focus and anxiety into awe.
For those who prefer a visual introduction, the following video offers a beautiful immersion into the landscapes and atmosphere of a classic coastal drive, perfectly complementing the practical advice in this guide.
To help you navigate this comprehensive guide, we’ve broken down the essential skills and knowledge into distinct sections. This structure will allow you to build your confidence step-by-step, from fundamental safety principles to advanced exploration strategies.
Summary: A Guide to Mastering Scenic Coastal Drives
- Why the Driver Can’t Look at the Ocean While Moving?
- How to Navigate Tight Coastal Switchbacks Without Crossing the Line?
- Ocean Side or Cliff Side: Which Lane Offers the Best Experience?
- The Re-entry Mistake: How to Merge Back Safely on Blind Curves?
- When to Start Your Drive to Catch the Sunset at the Best Overlook?
- Why Do Some Coastlines Crumble While Others Stand Firm?
- When to Arrive at Popular Spots to Get the Golden Hour Alone?
- How to Find Hidden Gems While Driving Without a Plan?
Why the Driver Can’t Look at the Ocean While Moving?
The core reason a driver cannot afford to look at the ocean while in motion is a simple, brutal matter of cognitive science: visual discipline. Your brain can only truly focus on one critical task at a time, and when you’re driving, that task is navigating the path ahead. A glance at a breaching whale or a spectacular wave is not just a glance; it’s a “task switch.” This momentary lapse is the definition of distracted driving, a behavior so dangerous that 3,275 people were killed in distraction-affected crashes in 2023 alone, according to NHTSA data.
On a straight, multi-lane freeway, a two-second glance away might be recoverable. On a coastal highway, two seconds can mean missing the critical entry point for a tightening curve or failing to spot an oncoming vehicle drifting over the centerline. The car travels where your eyes look. If your gaze is fixed on the horizon, your hands will subconsciously follow, pulling you toward the very edge you fear. This isn’t a failure of willpower; it’s how our brains are wired.
The solution isn’t to resent the view but to adopt a system. True visual discipline for coastal driving involves keeping your eyes constantly scanning the road far ahead, looking through the turns to where you want the car to go. By focusing on the exit of a curve, you naturally guide the vehicle along the correct path. The ocean becomes part of your peripheral vision—an ambient beauty you absorb without making it your focal point. The reward for this discipline is arriving safely at the next vista point, where you can stop and give the magnificent scenery your full, undivided attention.
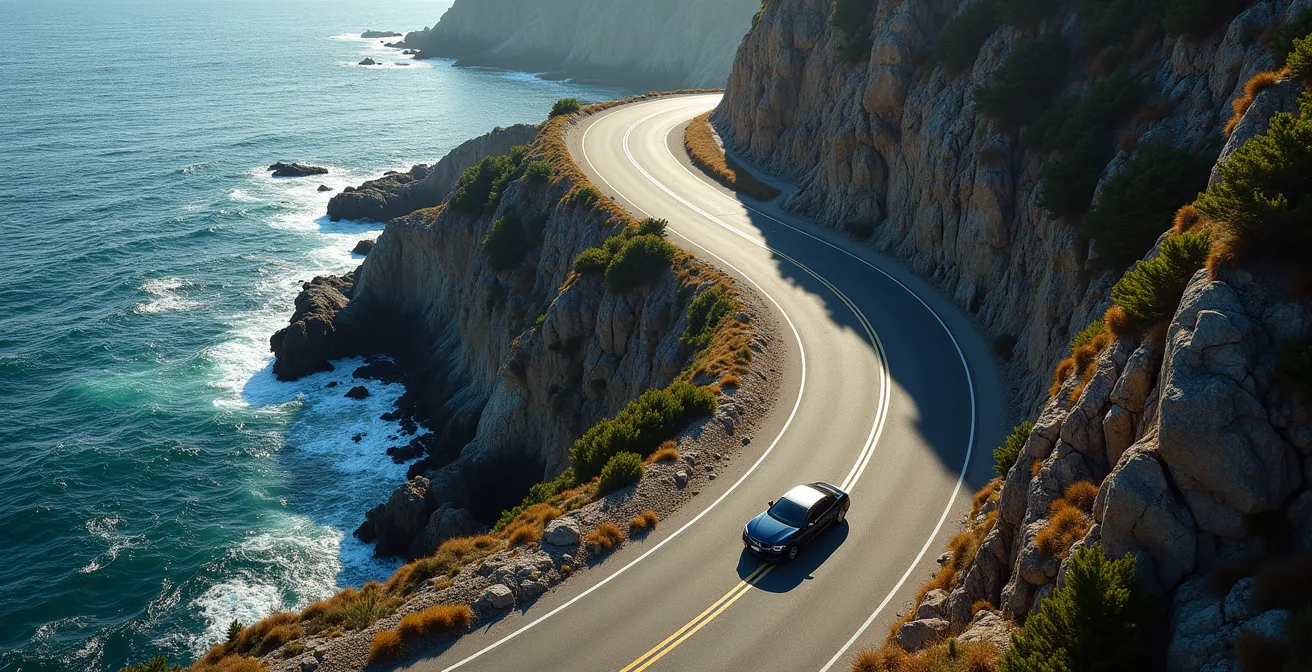
How to Navigate Tight Coastal Switchbacks Without Crossing the Line?
Navigating a tight coastal switchback, or hairpin turn, without crossing the yellow line is a dance between speed, steering, and position. Most nervous drivers make the same mistake: they carry too much speed into the turn and then brake or steer sharply mid-corner, upsetting the car’s balance. The key to a smooth, safe turn is proactive navigation, where all major adjustments are made *before* the turn begins. Your mantra should be “slow in, fast out.”
This paragraph introduces the core technique for handling sharp turns. To properly visualize this, look at the diagram below which illustrates the “apex” method on a coastal road.
As the image demonstrates, the technique involves positioning your vehicle on the outside of the lane as you approach the curve. Before you start turning the wheel, brake smoothly to a manageable speed. As you enter the turn, aim for the “apex”—the innermost point of the curve. Hitting this point allows you to straighten the wheel earlier on exit, letting you accelerate gently out of the turn. This technique maximizes your visibility around the bend and minimizes the centrifugal force pushing you toward the outside line. It transforms a series of jerky, unnerving corners into a single, fluid rhythm.
Ocean Side or Cliff Side: Which Lane Offers the Best Experience?
The choice between the ocean-side lane and the cliff-side lane seems simple, but it profoundly impacts both your view and your psychological comfort. Each has distinct advantages and disadvantages that change depending on your direction of travel and your primary goal for the journey. For instance, on a classic North American coastal drive like Highway 1, driving southbound places you in the ocean-side lane, while northbound puts you against the cliff.
To help you decide which is best for your trip, the following table breaks down the key differences, based on insights from experienced road-trippers and guides for routes like the Pacific Coast Highway.
| Aspect | Ocean Side Lane | Cliff Side Lane |
|---|---|---|
| View Quality | Direct, unobstructed ocean views | Limited ocean visibility, better road focus |
| Access to Overlooks | Direct, easy pull-off access | Requires crossing a lane of traffic |
| Safety Perception | More exposure to the edge, can be unnerving | Psychological barrier from the cliff wall |
| Weather Risks | Sea spray, intense sun glare at sunset | Potential for small rockfall in some areas |
| Best For | The scenic return journey; photography | The initial drive; drivers nervous about heights |
Ultimately, there is no single “best” lane. A strategic approach is to use both. Consider driving your initial leg on the cliff side. This allows you to focus on learning the road’s rhythm with the psychological comfort of a rock wall beside you. For the return journey, take the ocean-side lane. Already familiar with the road, you’ll have more mental bandwidth to safely enjoy the unobstructed views and easily pull into the scenic overlooks you scouted on the way out.
The Re-entry Mistake: How to Merge Back Safely on Blind Curves?
Stopping at a breathtaking overlook is a highlight of any coastal drive, but re-entering traffic can be one of its most dangerous moments. The “re-entry mistake” is pulling out slowly or hesitantly from a pullout, especially on a blind curve. This forces oncoming traffic, who may be traveling at speed, to react suddenly. The danger is compounded by a psychological factor: after a stop, your focus has been reset. It can take a surprising amount of time for your brain to get back “in the zone,” with research from UC Irvine showing it takes an average of 23 minutes to regain full focus after just one interruption.
This loss of focus makes a structured, decisive re-entry protocol essential. You cannot rely on a quick glance in the mirror. You need a systematic process to ensure the way is clear and to communicate your intentions effectively to other drivers. This isn’t the time for timidity; a confident, brisk acceleration once the path is clear is far safer than a slow, creeping merge.
To ensure you perform this maneuver safely every time, use the following checklist. It breaks the process down into four simple, memorable steps.
Action Plan: The SPOP Protocol for Safe Re-entry
- Signal: Activate your turn signal long before you intend to move. This is your primary communication tool to alert drivers behind you.
- Position: While waiting, position your car with the wheels angled decisively toward the road. This allows for a quick exit without extra maneuvering once the path is clear.
- Observe: Check your rearview mirror, your side mirror, AND perform a full head check over your shoulder to cover the notorious blind spot. Do this multiple times.
- Proceed: Once you have verified the path is completely clear, accelerate briskly and confidently into the lane. Do not hesitate. Match the flow of traffic as quickly as safely possible.
By making this protocol an automatic habit, you eliminate the guesswork and drastically reduce the risk associated with one of the most common danger points on a scenic drive.
When to Start Your Drive to Catch the Sunset at the Best Overlook?
Timing your drive to catch a perfect coastal sunset is more science than luck. Arriving too early means waiting around; arriving too late means missing the magic. The goal is to be at your chosen overlook not just for the sunset itself, but for the “golden hour”—the period roughly one hour before sunset when the light is soft, warm, and magical for both viewing and photography. To achieve this, you must work backward and account for the unique variables of coastal driving.
A standard GPS travel time is a dangerously optimistic starting point. You need to build in a significant buffer. A good rule of thumb is to multiply the GPS-estimated travel time by at least 1.5 to account for slower scenic speeds, potential traffic at popular spots, and your own unhurried pace. Then, add 15-20 minutes for every planned stop along the way. Finally, ensure your calculated arrival time is 45-60 minutes *before* the official sunset time to soak in the entire golden hour.
Professionals take this planning to another level, using specific tools to guarantee they are in the right place at the right time.
Case Study: The PhotoPills Method for Perfect Sunset Planning
Professional landscape photographers rely on apps like PhotoPills to eliminate guesswork. The app does more than just provide the sunset time; its augmented reality feature shows the exact trajectory of the sun on a map for any given day. This allows a photographer to choose an overlook not just with a clear view west, but one where the setting sun will perfectly illuminate the cliffs and coastline, creating dramatic, glowing light. By planning with this level of precision, they ensure the sun won’t frustratingly disappear behind a hill just before the main event, a common pitfall for casual tourists.
By adopting this mindset of proactive planning—factoring in buffer time, planning for golden hour, and checking the weather for potential marine layers that could obscure the view—you can orchestrate a perfect end to your day’s drive.
Why Do Some Coastlines Crumble While Others Stand Firm?
As you drive, you’ll notice the coastline’s personality changes dramatically. Some stretches feature sheer, solid cliffs that plunge into the sea, while others are a series of crumbling bluffs and wide, sandy bays. This isn’t random; it’s a direct reflection of the underlying geology, and understanding it makes you a safer, more aware driver. The type of rock dictates the shape of the road, the stability of the cliffs, and the specific hazards you need to anticipate.
The key difference is between hard, igneous rock and soft, sedimentary rock. An up-close look reveals the contrast in their textures and stability.

As seen in the textural differences, harder rocks like granite and basalt are highly resistant to erosion. They form the sheer, dramatic headlands and support tighter, more winding roads. The primary hazard here is not landslides, but the potential for rockfall, especially after heavy rain or freeze-thaw cycles. In contrast, softer rocks like sandstone and shale crumble easily under the ocean’s assault. These areas erode into gentler slopes and wider bays. While the roads may be straighter, the ground itself is less stable, making these zones more prone to landslides and road washouts. Weather changes, like sudden fog banks or intense winds, are also more common as the ocean has a greater influence on the local climate in these open bays.
When to Arrive at Popular Spots to Get the Golden Hour Alone?
The paradox of famous overlooks is that their beauty attracts the very crowds that can diminish the experience. Arriving during golden hour often means sharing the moment with dozens of other people. However, with a bit of contrarian thinking, it’s possible to capture that magical light in relative solitude. The secret is to zig when everyone else zags.
Rather than fighting for a parking spot at the main event (sunset), consider these strategies to find your own private piece of the spectacle:
- Choose sunrise over sunset. The light is just as beautiful, but the crowds are a fraction of what they are in the evening. It requires an early start, but the reward is tranquility.
- Apply the “Plus/Minus 1km Rule.” The most famous pullout is always the most crowded. Walk or drive a short distance away from the main spot. You’ll often find equally stunning vantage points with no one around.
- Leverage “bad” weather. Overcast or foggy conditions deter most tourists, but they can create incredibly dramatic and moody lighting for those willing to brave them. A sunbeam breaking through the clouds is often more memorable than a clear sky.
- Visit during the shoulder seasons. Spring and fall offer similar light and weather to summer but with significantly fewer visitors.
- Wait for the “blue hour.” Don’t leave immediately after the sun dips below the horizon. The 20-30 minutes that follow, known as the blue hour, offer deep, saturated colors and a peaceful atmosphere as most people have already departed.
By thinking like a landscape photographer, you can outsmart the crowds. It’s not about avoiding the popular spots, but about experiencing them on your own terms, often by simply adjusting your timing and being willing to explore just beyond the beaten path.
Key Takeaways
- Safe coastal driving is an active skill, not a passive hope. Proactive techniques create the mental space to enjoy the view.
- The biggest dangers are predictable: distraction, misjudged turns, and unsafe re-entry after a stop. Each has a specific technical solution.
- Strategic planning—choosing your lane, timing your drive for the best light, and understanding the geology—transforms a drive from stressful to sublime.
How to Find Hidden Gems While Driving Without a Plan?
One of the greatest joys of a coastal drive is the thrill of discovery—stumbling upon a deserted beach, a tiny local café, or an unmarked vista that isn’t in any guidebook. Yet, driving with absolutely no plan can lead to anxiety about missing the “must-see” spots or running out of fuel. The solution is a hybrid approach I call “Planned Spontaneity.” It provides a structural backbone for your trip while leaving ample room for serendipitous exploration.
This method reduces the mental load and distraction of constantly checking a map or phone, a behavior that is slowly decreasing but still a risk. In fact, a focus on planning can help; Cambridge Mobile Telematics reports an 8.6% decrease in phone-based distraction in early 2024, showing that better habits and planning are making a difference. The Planned Spontaneity method involves creating a simple framework:
- Create a skeleton plan: Before you go, identify just two or three “anchor” locations you absolutely want to see and mark them on a map. These are your only fixed points for the day.
- Leave 50% of your time unscheduled: If your drive is six hours, dedicate three of those hours to pure exploration between your anchor points. This is your “discovery time.”
- Scan the map for possibilities: Look for small, unnamed roads that fork off the main highway toward the coast. These often lead to hidden coves or local-only viewpoints.
- Talk to locals: Stop at a local gas station or café (not a tourist trap) and simply ask, “What’s your favorite spot around here that most tourists miss?”
- Trust the signs: Keep an eye out for official brown “Vista Point” or “Coastal Access” signs. They are often placed for a reason and can lead to spectacular, less-crowded spots.
This approach gives you the best of both worlds: the security of knowing you’ll hit your key highlights and the freedom to get wonderfully, intentionally lost along the way.
By mastering these techniques, you transform the drive from a means to an end into the destination itself. Your newfound confidence and understanding of the road will allow you to not just see the coast, but to truly experience it. Now, the only thing left to do is plan your route, fill up the tank, and put these skills into practice on your own unforgettable coastal journey.